How to Change Your License Plate Light Bulb in 5 Easy Steps
A functional license plate light bulb is essential for safe and legal driving. This small but crucial component ensures that your vehicle’s license plate remains visible at night, helping law enforcement and other drivers identify your car. When a license plate light bulb burns out, it’s important to replace it promptly to avoid potential fines and maintain proper visibility.
Changing a license plate light bulb is a simple task that most car owners can handle themselves. This article will guide you through the process step-by-step, covering everything from gathering the necessary tools to testing the new bulb. You’ll learn how to access the license plate light assembly, remove the old bulb, and install a new one correctly. By following these instructions, you’ll be able to replace your license plate light bulb quickly and easily, ensuring your vehicle stays compliant with vehicle laws and regulations.
Gather Necessary Tools and Materials
Before beginning the process of changing a license plate light bulb, it’s essential to gather all the necessary tools and materials. This preparation ensures a smooth and efficient replacement process.
Required tools
To change a license plate light bulb, one typically needs a few basic tools. A flathead screwdriver is often sufficient to disengage the clip holding the light assembly in place. However, depending on the vehicle model, a Phillips head screwdriver may be necessary to remove the light cover. In some cases, such as with certain Skoda models, torx screws may be used, requiring a screwdriver with a torx bit.
For added convenience and to prevent scratches during the removal process, a PVC plastic pry tool can be helpful. These tools are designed with shaped edges on both sides and are compatible with most interior lamp covers, license plate lamp covers, and dashboard panels. They measure approximately 6.5 inches in length, 1 inch in width, and 0.25 inches in height.
Replacement bulb specifications
Selecting the correct replacement bulb is crucial for proper functionality and compliance with vehicle laws. The most common type of license plate light bulb is a 12-volt, 5-watt bulb. However, it’s essential to consult the vehicle owner’s manual to get the correct bulb specifications for your specific make and model.
There are two main types of bulbs available for license plate lights: incandescent and LED. Incandescent bulbs are the traditional option found in older vehicles and many new cars. They contain a filament that glows when heated by an electric current. However, these bulbs are less efficient and tend to grow dimmer over time.
LED bulbs are becoming increasingly popular due to their superior efficiency and brightness. They don’t generate heat to produce light, making them more energy-efficient. LED bulbs also last longer and maintain their brightness throughout their lifespan. When choosing LED bulbs, it’s important to ensure they are road legal, as some may not comply with regulations.
The most common bulb type for license plate lights is the T10 wedge base, which includes various part numbers such as 194, 168, W5W, and others. These bulbs typically push into the light socket or electrical connector. When purchasing a replacement bulb, it’s crucial to ensure it’s the correct fitment for your vehicle.
By gathering the necessary tools and selecting the appropriate replacement bulb, you’ll be well-prepared to change your license plate light bulb efficiently and effectively.

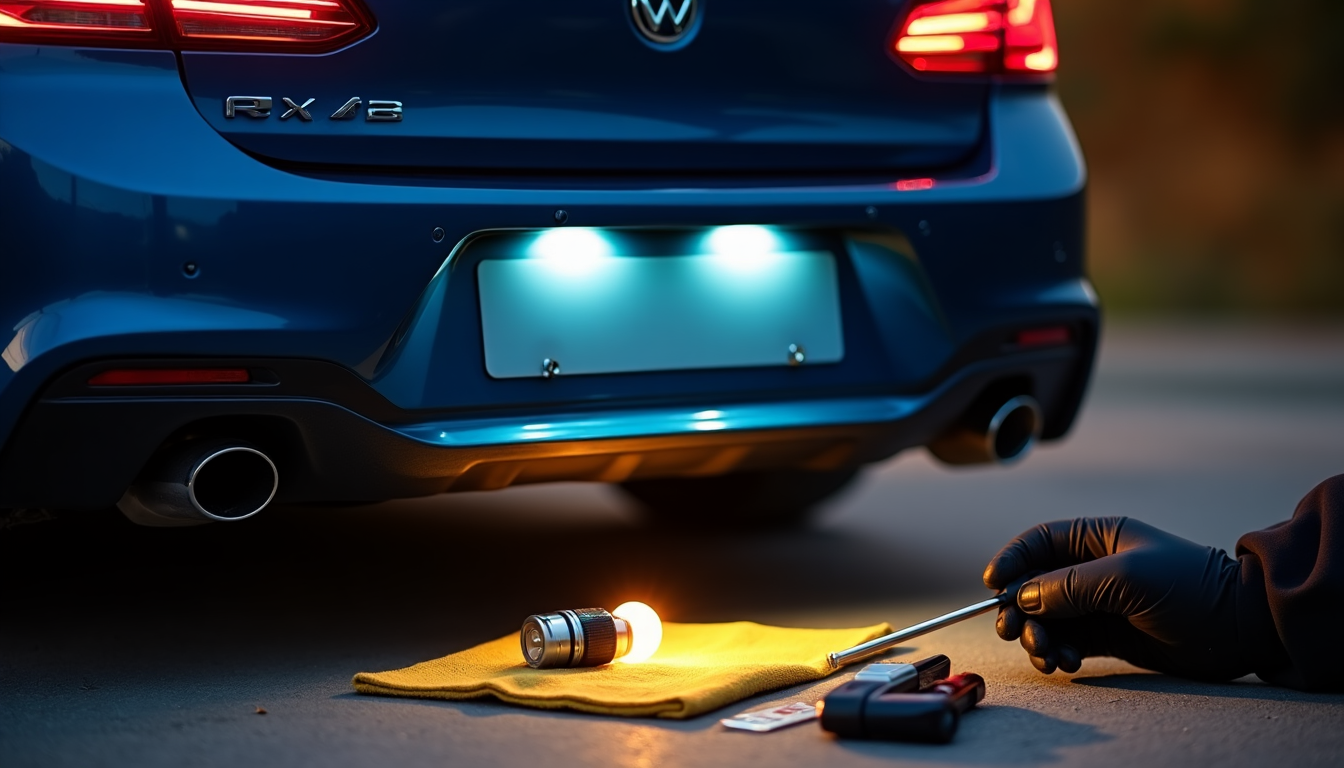
Image Source: AI Generated
Locate and Access the License Plate Light
Common locations
License plate lights are typically found in one of two main locations on a vehicle. The most common placement is on the rear bumper, just above or below the license plate. In some vehicles, particularly station wagons or hatchbacks, the lights may be located on the tailgate, often near the handle used to open and raise the tailgate.
For instance, on a Skoda station wagon, the license plate lights are situated on the tailgate, adjacent to the handle for opening the rear door. In contrast, on a Renault Clio, the license plate light is positioned on the bumper. It’s essential to consult the vehicle manual or carefully inspect the rear of the car to determine the exact location of the license plate lights.
Removing covers or panels
The method for accessing the license plate light bulb varies depending on the vehicle model and the light’s location. There are two primary systems for securing the license plate light:
- Clip system: Many vehicles use a clip or latch system to hold the license plate light in place. To remove the light assembly, a small flathead screwdriver is typically used. The screwdriver is inserted into a slot or latch on the side of the light, and gentle pressure is applied to pull the assembly out. This method doesn’t require unscrewing anything and allows for quick access to the bulb.
- Screw system: Some vehicles, like certain Skoda models, secure the license plate light with screws. In this case, two screws usually hold the light cover in place. A Phillips head screwdriver or, in some instances, a torx screwdriver is needed to remove these screws. After removing the screws, the light cover can be carefully detached to access the bulb.
In some cases, accessing the license plate light may require removing interior panels. For example, in certain vehicles, it’s necessary to remove a plastic panel attached to the lift gate. This process involves unscrewing the screw going into the handle, removing the plastic handle, and then pulling off the panel, which is typically held in place by plastic clips.
It’s important to note that some license plate lights may appear to require inward prying towards the bulb. However, this approach can lead to scratches or damage. Instead, the correct method often involves prying outwards, away from the bulb, to unhook the clear plastic cover from the tab fixed to the mount underneath.
When removing covers or panels, it’s advisable to store any screws or fasteners in a small container to prevent loss. Additionally, handle all components with care to avoid damage to the vehicle’s paint or the light assembly itself.
By understanding these common locations and removal techniques, car owners can more easily access their licence plate light bulbs for replacement or maintenance.
Remove and Replace the Old Bulb
Once the license plate light assembly has been accessed, the next step is to remove the old bulb and install a new one. This process requires careful handling to avoid damaging the delicate components.
Disconnecting the old bulb
To begin, it’s important to ensure that the vehicle’s ignition is turned off to prevent any electrical shock. Some car owners even disconnect the battery as an extra precaution, though this is not always necessary for such a simple task.
To remove the old license plate light bulb, gently grip the base of the bulb and turn it counterclockwise. In most cases, the bulb will easily twist out of its socket. However, if the bulb has been in place for a long time, it may require a bit more force to loosen. Be careful not to apply too much pressure, as this could cause the bulb to break.
If the bulb is difficult to remove by hand, a pair of needle-nose pliers can be used to get a better grip. However, extreme caution should be exercised to avoid shattering the glass. In the event that the bulb does break, a potato cut in half can be used to safely remove the remaining base from the socket.
Installing the new bulb
Before installing the new license plate light bulb, it’s a good idea to clean the socket and check for any signs of corrosion. If corrosion is present, it can be gently cleaned with a small wire brush or sandpaper. Some car owners apply a small amount of dielectric grease to the bulb’s metal contacts to improve conductivity and prevent future corrosion.
When handling the new bulb, it’s best to avoid touching the glass part with bare hands. The oils from skin can create hot spots on the bulb, potentially shortening its lifespan. If possible, use gloves or handle the bulb by its base.
To install the new bulb, simply insert it into the socket and turn it clockwise until it’s securely in place. Make sure not to overtighten, as this could damage the bulb or the socket. If you’re replacing a halogen bulb with an LED, ensure that the new bulb is compatible with your vehicle’s electrical system and complies with local regulations.
After installation, it’s crucial to test the new bulb before reassembling everything. Turn on the vehicle’s lights and verify that the license plate light is functioning correctly. If the light doesn’t work, double-check the installation and ensure the bulb is properly seated in the socket.
Once the new bulb is confirmed to be working, carefully reattach the light cover or assembly. Make sure any gaskets or seals are properly aligned to prevent water ingress. Tighten any screws securely, but be careful not to overtighten and potentially crack the plastic housing.
By following these steps, car owners can successfully remove and replace their license plate light bulb, ensuring their vehicle remains compliant with vehicle laws and maintains proper visibility at night.
Test and Reassemble
Checking the new bulb
After installing the new license plate light bulb, it’s crucial to test its functionality before reassembling the light assembly. To do this, turn on the vehicle’s lights and verify that the new bulb illuminates properly. If the light doesn’t work, there are a few troubleshooting steps to follow.
First, ensure that the bulb is securely seated in its socket. Sometimes, a loose connection can prevent the bulb from lighting up. If the bulb still doesn’t work, use a multimeter to check for power at the socket. Set the multimeter to the 12V or 20V DC range and touch the probes to the metal contacts in the socket. With the lights on, you should see a reading of around 12 volts. If there’s no voltage, there may be an issue with the wiring or a blown fuse.
In some cases, the problem might not be with the bulb itself but with the wiring or connectors. Inspect the wiring for any signs of damage or corrosion. If you notice any frayed wires or corroded connectors, these will need to be repaired or replaced to restore proper functionality.
Securing covers and plates
Once the new license plate light bulb has been tested and confirmed to be working correctly, it’s time to reassemble the light assembly. This process varies depending on the vehicle model, but generally involves replacing the light cover and securing it in place.
For vehicles with a clip system, carefully align the light assembly with its mounting point and press it firmly until it clicks into place. Ensure that the assembly is flush with the surrounding surface and that there are no gaps where water could enter.
If your vehicle uses screws to secure the license plate light, replace the cover and insert the screws. Use the appropriate screwdriver, whether it’s a Phillips head or a torx screwdriver, to tighten the screws. Be careful not to overtighten, as this could crack the plastic housing or strip the screw threads.
For vehicles where accessing the license plate light required removing interior panels, make sure to replace these panels correctly. Align any clips or fasteners and press the panel back into place. If there were any screws holding the panel, replace and tighten them securely.
After reassembly, it’s a good idea to perform one final check of the license plate light. Turn on the vehicle’s lights again and verify that the new bulb is still functioning properly and that the light is evenly illuminating the license plate.
By following these steps for testing and reassembling, you can ensure that your new license plate light bulb is working correctly and securely installed, keeping your vehicle compliant with vehicle laws and regulations.
Conclusion
Changing a license plate light bulb is a straightforward task that has a big impact on your vehicle’s safety and legal compliance. By following the steps outlined in this guide, you can easily replace the bulb yourself, saving time and money. This simple maintenance job helps to keep your car visible at night and prevents potential fines from law enforcement.
Remember that regular checks of your vehicle’s lights, including the license plate light, are crucial to maintain safety on the road. By staying on top of these small but important tasks, you ensure your car remains in good working order and compliant with traffic laws. So next time you notice your license plate light is out, don’t put off the repair – grab your tools and get to work!
FAQs
1. Is replacing a licence plate light bulb a straightforward process?
Yes, changing a licence plate light bulb typically involves a few simple steps. First, unscrew the licence plate and its bracket for better access. Use a screwdriver to pry out the licence plate lamp. Most lamps have a specific notch for this purpose, although some may need to be unscrewed instead. Finally, disconnect the power connector to remove the bulb.
2. How do I switch out a licence plate light bulb?
To change a licence plate light bulb, begin by removing the licence plate to access the bulb housing easily. Depending on your vehicle, you might need to use a screwdriver to pry out the lamp or unscrew it. Disconnect the power connector before installing the new bulb.
3. What is the procedure for installing LED lights on a licence plate?
To install LED lights on a licence plate, start by using a flathead screwdriver to remove the cover of the licence plate housing. Next, take out the bulb housing and the original licence plate bulb. Replace it directly with the new LED bulb. Ensure everything is reassembled in the same order it was removed.
4. How do you replace a licence plate bulb on a Toyota?
To replace a licence plate bulb on a Toyota, you will typically need to access the bulb by removing the licence plate and any necessary covers or panels. Use a screwdriver to remove the housing cover and replace the old bulb with a new one. Ensure all components are securely reassembled after the replacement.
Author
I am Rahatul Ashiq Tamal. Another author of Muscle Trailers. Muscle Trailers is a well-known trailer brand in Sydney, Melbourne & Adelaide

How to Mount a Spare Tire on Your Trailer: A Simple Step-by-Step Guide
Trailer service centers receive over 1 million phone calls and 1.3 million emails each year about trailer maintenance problems....

How to Fix RV Roof Leaks: Simple Roof Leak Detection Guide for Beginners
Did you know DIY RV roof repairs can cost under $50? But undetected leaks could lead to substantially higher repair...

Starting a Food Truck Business in Australia: From Trailer Selection to Launch
The Australian mobile food market has evolved into a billion-dollar industry. This makes a food truck...
