How to Apply Trailer Paint for a Durable Finish: Step-by-Step Guide
A poorly painted trailer can show rust spots within just 6 months.
Our experience shows countless trailers deteriorate too soon – not from paint quality issues but because people don’t apply it correctly. The right trailer paint application can add 10 years to your trailer’s life, whether you need to refresh an old utility trailer or protect a new boat trailer.
Here’s the best part – professional painting services aren’t necessary. You can create a showroom-quality finish in your driveway. The secret lies in proper preparation, selecting the best paint for trailer surfaces, and mastering correct application techniques.
This detailed guide will show you each step of the trailer painting process. We’ll cover everything from surface preparation to the final protective coat. Your trailer will become a rust-resistant, head-turning hauler that stands the test of time.
Essential Surface Preparation Steps
Surface preparation determines whether your paint job lasts years or fails within months. These vital steps will build the foundation for a durable finish.
Removing Old Paint and Rust
Your trailer’s worst enemy is rust, capable of destroying a trailer in just a few years if left untreated. A wire brush works best to remove loose rust and flaking paint. These proven steps help with stubborn areas:
- Start with a wire wheel attachment on an angle grinder
- Remove all visible rust spots and loose paint
- Sand the surface until smooth
- Pay special attention to welded areas
- Check for spots where rust has completely penetrated
Cleaning and Degreasing the Surface
Clean-looking surfaces can hide invisible contaminants that prevent paint adhesion. A solvent-based degreaser works best to remove oil, grease, and road grime. Apply the degreaser generously to all surfaces, with extra attention to:
- Areas with visible oil stains
- Wheel wells and undercarriage
- Spots where old paint is peeling
Applying Rust Converter and Primer
Any remaining rust spots need attention after cleaning. A quality rust converter will chemically transform rust into a stable compound that stops further corrosion. The best results come from applying rust converter right after surface preparation.
A proper primer application plays a significant role in long-term durability. An etch primer designed specifically for aluminium and metal surfaces creates the strongest bond between metal and topcoat. Important: Apply the primer quickly after cleaning to prevent flash rust formation.
Double-check all corners and crevices during each step. The time spent on surface preparation might seem long, but it creates a professional-quality paint job that protects your trailer for years.
Galvanized Trailers Pros and Cons
Galvanized trailers offer a unique approach to durability and corrosion resistance, thanks to their protective zinc coating. This coating provides an impressive defense against rust, making galvanized trailers particularly suitable for harsh environments, such as coastal areas where saltwater exposure is a concern. The main advantage of galvanized trailers is their longevity; they can last over 20 years with minimal maintenance, showcasing their enduring longevity. However, the higher initial cost of galvanizing can deter some buyers. Additionally, while galvanized surfaces are durable, they may lack the aesthetic appeal of powder-coated or painted options, which can be customized in various colors.
On the other hand, while galvanized trailers excel in corrosion resistance, they can be challenging to repair if damaged. Any scratches or chips in the zinc coating can lead to rust formation if not addressed promptly. Furthermore, the process of galvanizing can limit the design flexibility for trailer manufacturers, as not all parts can be effectively treated. Understanding these pros and cons will help you make an informed decision when considering a galvanized trailer for your needs.
The Galvanizing Process and Its Benefits for Durability
To ensure a lasting finish, start by removing old paint and rust from the trailer surface. Follow up with a thorough cleaning and degreasing process using appropriate solvents. Next, apply rust converter and primer to protect the metal surface from corrosion. This foundational preparation sets the stage for a durable paint job that can withstand various environmental elements. Properly primed surfaces guarantee the longevity of the paint coating, especially on heavy-duty trailers prone to wear and tear.
Choosing the Right Paint Type
Paint choice makes all the difference between a lasting finish and quick failure on your trailer. Let’s look at the best options you can use.
Epoxy-Based Paints vs Regular Paints
Epoxy-based paints protect better than standard paints. Regular paint just dries, but epoxy-based products create a chemical bond with the surface. Our experience shows that epoxy coatings provide the highest level of durability for trailers. These coatings bond better with metal surfaces and resist peeling and chipping by a lot.
But there’s a catch – pure epoxy coatings can be tough to apply because they’re non-porous. That’s why we suggest epoxy-paint hybrids for DIY projects. These give you a good mix of durability and ease of use.
UV-Resistant Paint Options
UV protection is a vital part of trailer paint that stays outdoors. Here are some proven options we recommend:
- Two-pack acrylic topcoats – Great gloss retention and UV resistance
- Polyurethane finishes – Top-notch color retention and durability
- Acrylic-modified polyurethane – UV protection with excellent adhesion
Understanding Paint Durability Ratings
Paint durability goes beyond thickness – it’s about the complete protection system. Today’s trailer paints come rated for:
- Weather Resistance: Look for “waterproof/weather resistant” labels
- Chemical Resistance: Essential if your trailer faces various substances
- Impact Resistance: Helps protect against road debris
- Cure Time: Products take 2 to 7 days to fully cure
Our tests show that two-pack systems consistently outperform single-component paints. With proper installation and care, these systems last over a decade. Standard paints need recoating every 5-10 years.
A quality paint system needs more than just a topcoat. We suggest using a complete system with:
- A zinc phosphate primer to resist corrosion
- A high-build intermediate coat
- A UV-stable topcoat for lasting protection
Premium paints cost more upfront but save money over time. They need less frequent repainting and protect your investment better.
Powder Coating as an Alternative
Powder coating is an increasingly popular choice for trailer finishes, offering a blend of durability and aesthetic appeal, including options like dark charcoal shades. Unlike traditional paint, powder coating involves applying a dry powder that is then cured under heat, creating a hard, protective layer. This method is particularly advantageous because it forms a thick and durable finish that is resistant to chipping, scratching, and fading. Additionally, powder coating is available in a variety of colors and textures, allowing for greater customization compared to galvanized or painted finishes.
One of the most significant advantages of powder coating is its environmental friendliness. The process produces fewer volatile organic compounds (VOCs) than liquid paints, making it a safer option for both the applicator and the environment. However, it’s important to note that the initial cost of powder coating can be higher than traditional paint. Moreover, achieving a flawless powder coating finish requires professional application, which may not be feasible for DIY enthusiasts. Ultimately, if you prioritize durability and visual appeal, powder coating could be the right choice for your trailer finish.
The Powder Coating Process and Advantages
For an effective trailer paint application, start by removing old paint and rust using appropriate tools. Next, clean and degrease the metal surface thoroughly. Apply rust converter and primer for added protection against corrosion. When choosing the paint type, consider factors like UV resistance and durability ratings. Opt for heavy duty epoxy-based or UV-resistant paints for longevity. Properly apply multiple protective layers using brush, roller, or spray painting techniques. Ensure environmental protection by painting in suitable weather conditions with proper ventilation and safety gear.
Professional Paint Application Techniques
Let’s head over to the hands-on techniques that will give your trailer that professional finish you want. Our testing of many application methods has shown what works best.
Brush Application Methods
Brush application remains our go-to method to handle detailed areas and tight spots. Our experience shows that brushes allow better paint thickness control and superior coverage in hard-to-reach areas. Here’s our proven process:
- Select a high-quality brush appropriate for your paint type
- Apply thin, even strokes in one direction
- Work in small sections (2-3 feet wide)
- Maintain a wet edge to prevent lap marks
- Allow proper drying between coats
Roller Application Tips
Rollers give you the perfect balance of speed and control on large, flat surfaces. Short-nap rollers work best for smooth surfaces. The quickest way to get optimal results with rollers is to thin your paint slightly. This helps achieve better flow and eliminate bubble marks.
The core team suggests these points when using rollers:
- Avoid overloading the roller with paint
- Use light pressure to prevent drips
- Roll in a consistent pattern
- Back-brush corners and edges for complete coverage
Spray Painting Guidelines
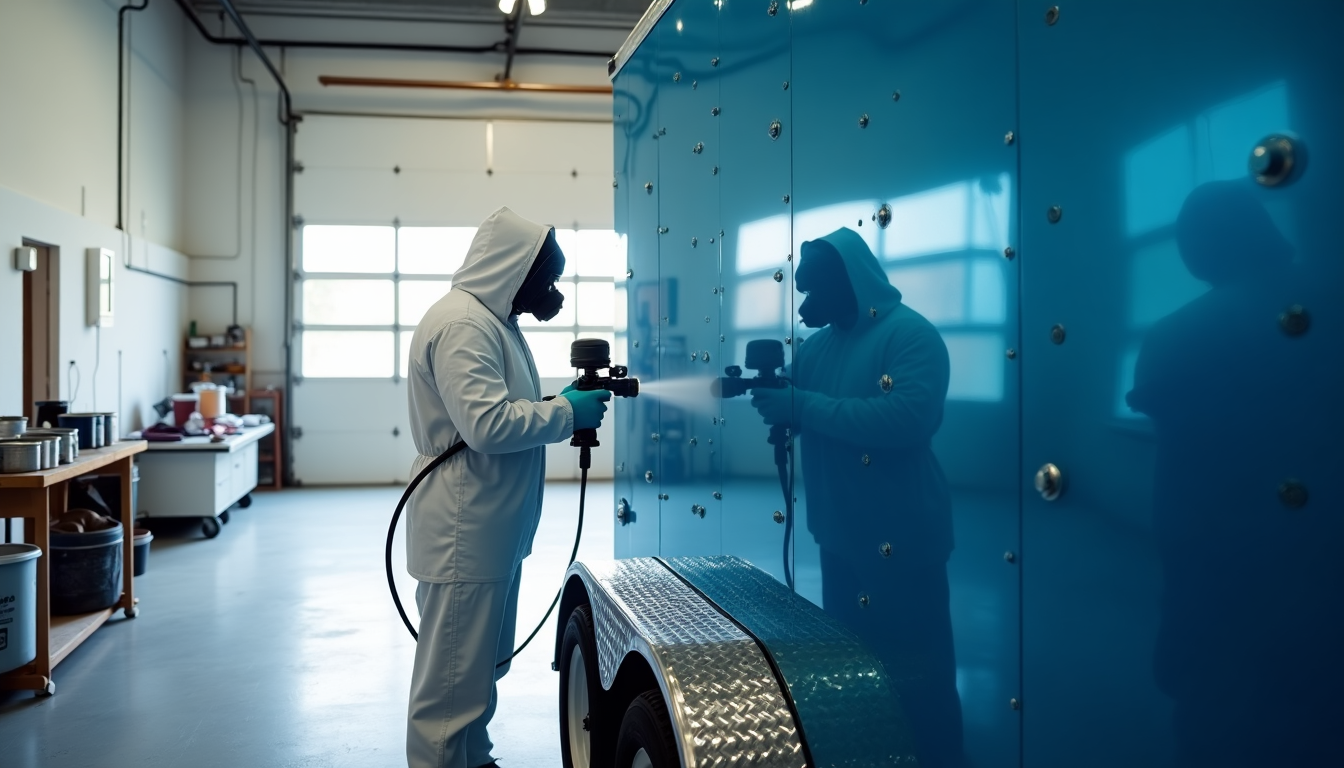
Spray painting offers quick application but needs careful setup and technique. High Volume Low Pressure (HVLP) sprayers give better control and less overspray compared to airless systems.
The right safety setup must come before any spray application. Essential safety equipment has:
- Respirator with appropriate cartridges
- Eye protection
- Protective clothing
- Adequate ventilation
A great spray finish needs consistent distance and overlap patterns. We apply 2-3 thin coats instead of one thick coat. This prevents runs and will give a smooth coverage. Each coat should become tacky (usually 1-2 hours) before the next layer goes on.
Note that spraying might seem faster, but setup and cleanup time can make it longer than other methods for smaller projects. Our team often suggests combining techniques – using spray for large areas and brush/roller for detail work.
Important: Whatever method you choose, never paint in direct sunlight or when the metal is hot. The paint can dry too quickly and affect adhesion.
Creating Multiple Protective Layers
A lasting finish on your trailer needs more than just one coat of paint. We found that there was a secret to professional-grade durability in creating multiple protective layers that work together.
Base Coat Application
The base coat protects your trailer first. Your original coat should be applied within 24 hours of primer application to get the best adhesion. Small batches work better with epoxy-based primers because the cure time doesn’t last long.
The base coat needs these steps:
- Apply a thin, even coat across entire sections
- Allow 10-20 minutes between original coats
- Check for complete coverage
- Apply a second coat if metal is still visible
- Let dry for 20 minutes before next layer
Building Up Paint Layers
Layering needs careful attention to transparency and thickness. Each layer adds protection while working with previous ones. These points will give you maximum durability:
- Allow 4-16 hours between layers for proper curing
- Apply thinner coats in lower layers
- Each layer must be completely dry before proceeding
- Keep thickness consistent throughout
Polyurethane-based solutions give exceptional abrasion resistance for a minimum of 5 years without chipping or peeling. This creates a resilient barrier against environmental challenges.
Final Protective Coating
A UV-stable, uv resistant top coat that creates an impermeable barrier is vital for long-term durability. This layer needs extra care since it shields your trailer from harsh elements.
Important: The final protective coating should flex more than layers underneath. Your paint job stays intact under stress this way.
A clear coat designed specifically to resist these elements gives maximum protection:
- Road grime and environmental contaminants
- UV radiation damage
- Chemical exposure
- Physical impacts
The complete curing process takes 5-7 days, but this time investment pays off with years of protection. Paint jobs with proper layers can last up to a decade with minimal maintenance.
Note that proper ventilation matters throughout the process since each layer releases fumes while curing. Safety First: Appropriate protective gear is a must, especially during final coat application, since these often contain the strongest chemicals.
Environmental Protection Measures
Safety comes first when painting your trailer. Our experience shows that environmental conditions and proper protection directly impact your paint job’s quality.
Weather Considerations During Painting
The best conditions to paint your trailer include temperatures between 15-20°C with humidity at 70-80%. These simple indicators will help you know if conditions are right:
- Your washing should dry outside quickly
- Water needs to evaporate from concrete within 15 minutes
- A light breeze works well, but strong winds cause problems
Important Warning: Direct sunlight or hot metal surfaces will cause rapid drying and poor adhesion. Start early in the morning and work ahead of the sun to get the best results.
Proper Ventilation Setup
Good ventilation keeps you safe, not just comfortable. Paint fumes are heavier than air and flow down drains or ventilation ducts. Our proven ventilation approach includes:
- Air intake points go high and extraction points stay low
- Proper airflow ensures adequate air changes
- Explosion-proof fans handle extraction
- All fumes go outside, never upstairs
- Air quality needs continuous monitoring
Paint fumes create serious fire risks. The paint’s flash point can get dangerously close to room temperature. This makes proper ventilation crucial before any paint application begins.
Safety Equipment Requirements
Quality protective gear saves lives. Here’s what you need based on industry standards:
- Respiratory Protection:
- Air-fed hood/mask works best in enclosed spaces
- Dust cartridge respirator suits well-ventilated areas
- Replace cartridges on schedule
- Body Protection:
- Non-spark footwear
- Protective overalls
- Chemical-resistant gloves
- Non-greasy barrier cream protects exposed skin
- Air-fed hood/mask works best in enclosed spaces
- Dust cartridge respirator suits well-ventilated areas
- Replace cartridges on schedule
- Non-spark footwear
- Protective overalls
- Chemical-resistant gloves
- Non-greasy barrier cream protects exposed skin
Critical Safety Note: Standard organic vapor respirators don’t protect against isocyanate-containing paints – you’ll need supplied air respiratory protection. Safety authorities enforce this rule strictly.
Good ventilation removes solvent fumes before work begins. Move to fresh air right away if you feel dizzy, get headaches, or seem intoxicated. Better ventilation must be in place before you continue.
These safety measures protect you and your workspace while giving your trailer the best possible finish. They’re not just rules – they keep you safe.
FAQs
Q1. What is the most effective method for painting a trailer? Start by thoroughly preparing the surface, including rust removal and cleaning. Apply a quality primer, then use multiple thin coats of paint rather than one thick coat. Allow proper drying time between coats and finish with a protective clear coat for best results.
Q2. Can I paint over existing trailer paint? Yes, but proper preparation is crucial. Sand the existing paint to create a smooth surface for better adhesion. Remove any loose paint or rust, clean thoroughly, and apply a suitable primer before painting. This ensures the new paint bonds well and lasts longer.
Q3. How should I paint a rusty trailer? Begin by removing loose rust with a wire brush or grinder. Apply a rust converter to stabilize remaining rust, then use a metal primer. Choose a rust-resistant paint and apply multiple thin coats. For severely rusted areas, consider replacing the metal if possible.
Q4. What’s the best type of paint for long-lasting trailer protection? Epoxy-based paints or epoxy-paint hybrids offer superior durability for trailers. Look for paints with high UV resistance, chemical resistance, and impact resistance. Two-pack systems generally outperform single-component paints, providing protection that can last over a decade with proper application and maintenance.
Q5. What safety precautions should I take when painting a trailer? Ensure proper ventilation, especially when working with solvent-based paints. Wear appropriate safety gear, including a respirator, eye protection, and protective clothing. Avoid painting in direct sunlight or extreme temperatures. Monitor air quality and take breaks in fresh air if needed. For isocyanate-containing paints, use supplied air respiratory protection.
Conclusion
Quality trailer painting demands attention to detail from surface prep to the final coat. We know how the right techniques and materials, including what is recommended by experts like POR 15, can substantially extend your trailer’s life.
Your paint job will last when you tackle each step the right way. Start by removing all rust, pick quality paints, add multiple protective layers, and stay safe throughout. Many DIY painters rush these steps. Taking your time during application separates a short-term finish from one that protects for years.
Weather conditions play a vital role in how well paint sticks and lasts. You need good ventilation, the right temperature, and safety gear to protect yourself and get professional results.
Your newly painted trailer will fight rust and look great for years when you focus on the details. These guidelines will help you match professional paint shop quality in your next project.
Author
I am Rahatul Ashiq Tamal. Another author of Muscle Trailers. Muscle Trailers is a well-known trailer brand in Sydney, Melbourne & Adelaide

How to Mount a Spare Tire on Your Trailer: A Simple Step-by-Step Guide
Trailer service centers receive over 1 million phone calls and 1.3 million emails each year about trailer maintenance problems....

How to Fix RV Roof Leaks: Simple Roof Leak Detection Guide for Beginners
Did you know DIY RV roof repairs can cost under $50? But undetected leaks could lead to substantially higher repair...

Starting a Food Truck Business in Australia: From Trailer Selection to Launch
The Australian mobile food market has evolved into a billion-dollar industry. This makes a food truck...
